![]()
![]()
![]()
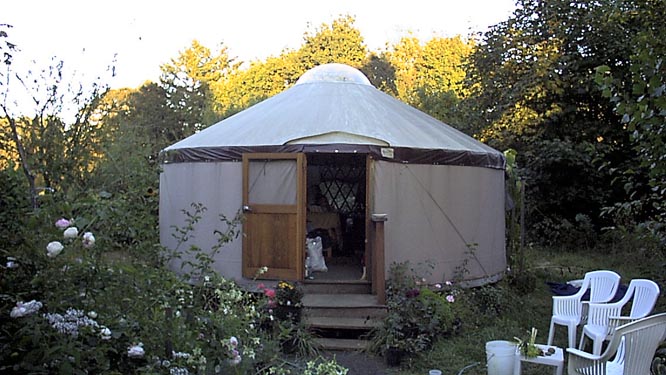
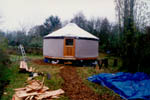
Think of it as a high tech Mongolian teepee. I live in a yurt on an organic farm in the Willamette Valley in Western Oregon. I have lived here since the Fall of 1995. The cabin I had been living in was crumbling and in imminent danger of sliding into the river. I didn't want to move away from the farm so I needed to provide myself with some temporary living space. After some research, I discovered yurts. I had no idea that the temporary living space would be so wonderful that I would make it permanent.
Try the [ Construction Tour ]
Checkout the complete [ Photo Index ]
or
Take the brief tour below...
![]()
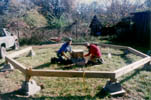
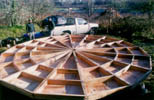
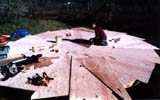
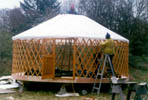
The yurt's deck took less than a week to construct. I wanted the deck to as portable as possible in case I needed to move. The deck is constructed from sixteen pie wedges. They rest on a leveled ring of 4x6 beams. A steel cable around the circumference holds the wedges tightly together. The flooring wedges are rotated with respect to the framed wedges by one inch. This provides an overlap between the pieces and an air seal.
|
|
|
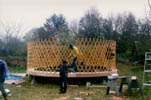
A bent plywood rim around the edge of the deck serves as an attachment point for the canvas yurt wall. It also works to keep the lattice framework from slipping off the deck during installation. Once spread out, the lattice is held in place by the door frame and the steel cable woven through the top V's of the lattice.
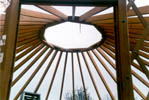
The rafters are attached to the steel tension cable at the walls and to a central ring in the middle. The central ring is raised using beams on opposite sides. The rest of the beams are inserted one at a time. The weight of the roof held give rigidity to the walls.
|
|
|
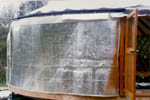
The wall is composed of three layers: the outermost layer is a thick weather resistant canvas, the middle layer is insulation. The insulation is like that bubble-pack stuff laminated between two layers of foil. It is an amazingly effective insulation in three eighths of an inch. The inner most layer is the wooden lattice framework. Inside the living space, the framework provides a bold repeating diamond pattern from floor to ceiling. There are three windows consisting of an innermost screen, a middle removable clear plastic sheet and an outer shield of the canvas wall material.
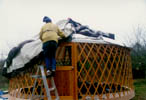
The apex of the roof is covered with a clear dome. A mechanism allows the dome to be opened a few inches for ventilation. It looks like a 1950 science fiction flying saucer dome.
I have found that the place does not need much heat in mild weather. It warms quickly in the sun. I have two heat sources when the natural ambient temperature is too cool. When the temperature is forty or above, I heat with an electric space heater or sit at my computer in my sleeping bag. For colder temperatures, I have a pellet stove. It is prone to overwhelming the space. I use it sparingly.
|
|
|
Living in this space is an adventure the Winter. While the winters are not extremely cold here, they are very wet. The last few have been wetter than most. I've given up trying to keep mud out. In December of 1995 a wind storm brought a tree down on the yurt. The shed took most of the force and was destroyed. The yurt suffered just a punctured roof. The farm that I live on an oxbow bend of a small river. Floods are common, but none have actually caused any damage.
I really want to thank my friends Scott Love and Randy Krahn for the construction work on the deck. Thanks also to Lew Ladd and his sons for the help in raising the yurt.
My yurt was manufactured by Pacific Yurts of Cottage Grove, Oregon.
![]()
hits on this page since the beginning of 1996. Counter provided by
WebCounter.
Comments? Queries? Send email: glacier