A Black & White joke:
Question: What do you call three million wood, two million food, three hundred villagers, a dozen artefacts, threescore miracle seeds, half a dozen huge wonders, and a giant, well-trained creature?
Answer: A good start.
Black & White Tips
Things I wish I’d known* when I began playing the Lionhead god game Black & White, or: build wonders
(*Of course, part of the fun is discovering things for yourself. If you dislike spoilers, read no further.)
Summary

Good god
Aside from a well-trained creature, your biggest advantages are high belief and a large area of influence. To increase the latter two, create artefacts, then use them to build huge wonders. Build wonders early and often; in story mode, start building them in the first village on land 2. Use Norse & Celtic wonders to fulfill your people’s resource needs, and Tibetan wonders to shield them from attack. Prepare for future story mode lands by tossing many things into vortexes.
The tips on this page are geared toward good gods, which is how I play.
In these tips, “land X” refers to the lands in story mode.
General Tips
In story mode, the different lands provide everything you need to win them, though how to do so may not be obvious. Here are some examples:
On every land except the first, there are a few high-yield trees where your temple will be built. That’s not a coincidence.
Land 4 offers three different sources of the Spiritual Shield miracle, which protects your village from fireballs and lightning.
When you begin land 5, wood is scarce; there are no forests within your influence, and you don’t have the Wood miracle. However, there are a lot of fertile shallows in your starting region, and you have the Water miracle. Might some forestry be in order?
When a land offers a lot of something, that’s a clue. Think about what it could be used for. If it doesn’t have an obvious use, experiment!
This also applies to the skirmish maps provided with the game.
Setup & Controls
You can’t change the resolution inside Black & White, but you can via the separate program setup.exe.
The time controls (P, Alt-1, Alt-2) are very useful for completing challenges requiring dexterity & quick reactions (e.g., land 3’s shaolin challenge), and for reaching beyond your influence temporarily (e.g., to remove the three dancing people supporting the Tibetan village shield in land 5).
On a slow machine, after land 1, autosave will take forever. Be daring and turn it off.
Screenshots have a one pixel wide black border on the right and bottom sides. Crop this border out to make a good screenshot. (For an even better screenshot, take two images from the same position, with your godly hand in different places. Then composite out the hand, as in this example.)
Artefacts
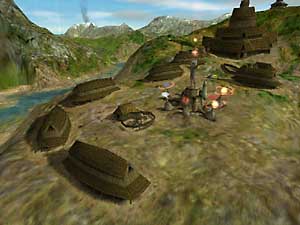
Artefactory dance party!
Making Artefacts
Rocks, fence segments, and the creature’s toys can become artefacts; I haven’t seen villagers dance around plants, miracle seeds, or creature poo, although I’ve heard the latter can become an artefact. When an artefact is fully charged, your icon will appear above it. This takes at least a day of game time in story mode, but less in skirmish mode.
Unbreakable rocks are preferred artefact material. Use the stones with runes (the singing stones and duds from land 1), and the brown “crying” stones (on the beach near the Indian village on land 3). Beach balls and the teddy bear might be good too; the dice are too small to keep track of. (You can find dice and the teddy bear inside land 1’s creche.)
Artefacts will gain your icon only in the village in which they began charging. If you start an artefact charging in village A and move it to village B before it gains its icon, the icon won’t appear until the artefact is returned to village A and finishes charging.
The icon only appears inside village limits. (As far as I can tell, the only way you only know you’ve crossed the limit is that the artefact’s icon doesn’t appear there.) Villagers won’t dance around artefacts outside a village, which means you can store artefacts outside villages while the villagers charge another artefact.
Artefact icons don’t reappear when loading a saved game, but they do reappear when artefacts are brought to a new land.
It may be my imagination, but Indian villages seem best to create artefacts in. They always have surplus villagers who are free to dance.
Using Artefacts to Gain Belief
The most effective way to use an artefact to increase a village’s belief is to place it in the village, wait a few moments the belief bonus to register, remove the artefact, then repeat the process a few minutes later. An artefact left in a village generates only a slow, small trickle of belief. In contrast, a place/remove/wait/replace strategy generates a large belief bonus each cycle.
When placing an artefact in a village, the more inhabitants, the greater the belief bonus. Also, the longer it’s been since the villagers have seen an artefact, the greater the belief bonus. I’ve seen belief bonuses as high as 600 in well-populated villages, though 50-200 is more common.
Keep an artefact in each village. For a quick belief boost everywhere, pick up an artefact in one village, tab to the next village, drop the artefact, and pick up the village’s old artefact. Repeat this process until you return to your starting village. Alternatively, you could carry the same artefact from village to village, but then you have to wait for the belief bonus to register before going on the next village.
A corollary to the previous tip: before you start a new land, create and put into the vortex as least as many artefacts as the new land has villages. Land 2 has eleven; land 3, five; land 4, four; and land 5, seven.
Artefacts and Wonders
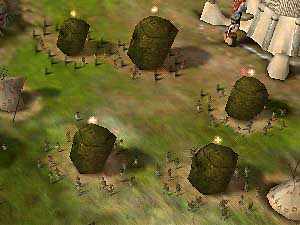
Artefacts boost wonder size. Always put a few near a wonder site; when placing the wonder scaffold, move it around near the artefacts until the prospective wonder becomes huge. After placing the scaffold, grab the artefacts and move them somewhere useful.
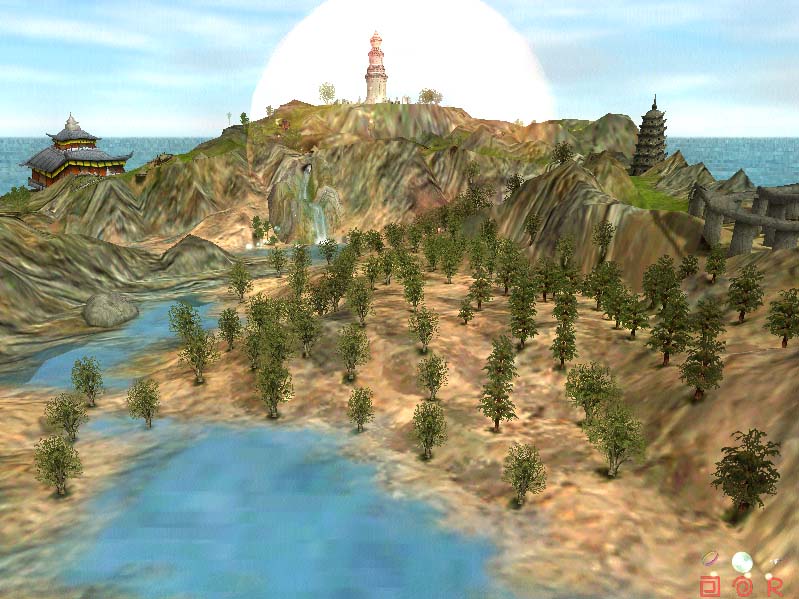
Wonders
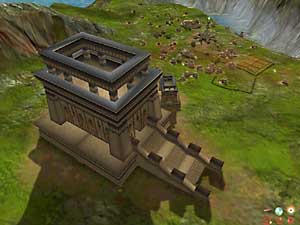
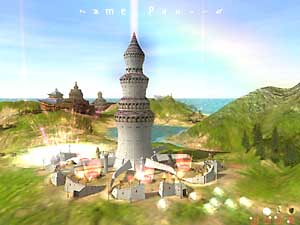
The most wondrous wonder of all
You can build wonders on land 2. Do!
Whenever you start a new land or convert a village, build a wonder as soon as possible. If you’ve got the wood, start it before any other buildings. On lands 2, 4, and 5, build two or three huge Norse wonders to end resource worries. On land 3, wonders are mostly for influence.
Ringing a wonder scaffold with artefacts boosts its size and power. Here’s an example of how huge Norse wonders boost wood miracle yield:
Huge wonders Wood miracle yield* 0 1660 1 33722 2 129822 3 166000 (the maximum) * varies widely with belief. One huge Norse wonder I built yielded only a small gain (~5,000?); another time, a single huge Norse wonder increased the Wood miracle by over 160,000.
As you’d expect, a wonder scaffold created in a Tibetan village becomes a Tibetan wonder, a wonder scaffold created in a Greek village becomes a Greek wonder, etc. It doesn’t matter where in the land you place the scaffold. However, when you start mixing scaffolds from different villages or bringing wonder scaffolds forward from a previous land, the situation becomes more complex.
When you mix scaffolds from different tribes, the type of wonder you get is determined by which tribe contributed the majority of the scaffolds. For example, a wonder scaffold created by combining four Japanese scaffolds and three Egyptian scaffolds will become a Japanese wonder. The order in which the scaffolds are combined doesn’t matter, unless no tribe contributes a majority of the scaffolds (i.e., there’s a 3-3-1 or 2-2-2-1 split). In this case, the type of wonder is that of the tribe that contributed the first scaffold.
When you bring a wonder scaffold through a vortex to a new land, its type is determined not by the tribe that created it, but by both the village it was made in on the previous land, as well as the villages on the new land. For example, a wonder scaffold created in land 2’s fourth village (which is Celtic) will become on the new land a wonder of the type of the tribe in the new land’s fourth village (Japanese). To use this information you have to know the village numbers, which are found in the
Scripts\LandX.txtfiles. As best as I can determine, here’s the mapping:Village Land 2 Land 3 Land 4 Land 5 0 Norse Celtic Norse Norse 1 Norse (Khazar’s home) Tibetan Norse (?) Norse (sailors’ village) 2 Greek (nearest Khazar) Egyptian Aztec Aztec 3 Celtic (middle village) Indian Japanese Tibetan (shielded by stones) 4 Celtic (closest to Greeks) Japanese Celtic (uninhabitable) Greek 5 Celtic (near Lethys’s temple) - Aztec (?) Tibetan (near Japanese) If there’s no corresponding village (e.g., a wonder scaffold made in land 2’s eighth village, but there are only five villages on land 3), the wonder scaffold will take its type from the nearest village.
I’m not sure what happens to a 3-3-1 or 2-2-2-1 scaffold brought through a vortex, though I suspect they take on the village number of the village that contributed the first scaffold.
Here’s a handy flowchart:
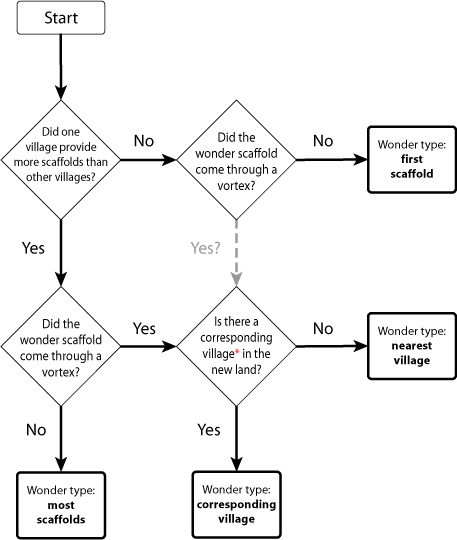
Notes: The gray path is untested. *If no village contributed a majority of scaffolds, “corresponding village” likely means the new land’s village corresponding to the village in the old land that contributed the first scaffold. (Got that?)
Practically speaking, what does this mean? You can’t build a Norse wonder on land 3, because there’s no Norse tribe on that land.
Which wonders should you build? Here’s my list, in order of preference:
Norse. An absolute must if it’s available, this wonder greatly increases the yield from Wood and Food miracles. With two or three huge Norse wonders, you can easily meet your villagers’ resource needs for hours at a time.
Tibetan. Increases the duration of shield miracles, and improves the Winged Creatures and Loving Creature miracles. It also decreases villager desires. With a few huge Norse and Tibetan wonders (Norse to provide food, Tibetan to decrease hunger), you can leave worshippers unattended at the worship site for half an hour at a time.
Jockeying for a distant third position are the Japanese, which expands the area affected by Heal miracles, and Indian, which speeds up your villagers.
The Egyptian, Greek, and Celtic wonders don’t do much for me. The Egyptian wonder improves the Winged Creatures miracle, but the Tibetan wonder does that too. The Greek wonder improves the Enlarge Creature miracle. With a Celtic wonder the Forest miracle yields large amounts of wood, but you have to spend time harvesting trees. It’s less convenient than a Norse-wonder-boosted Wood miracle, but handy on lands without a Norse tribe (like land 3).
Last and definitely least is the Aztec wonder. It improves aggressive miracles like Fireball and Megablast, which good gods don’t need. The problem with the Aztec wonder is that it makes your villagers worship faster, which means you must heal them more often. With a few huge Aztec wonders, you’ll need to heal your worshippers every few minutes—just the kind of micromanagement that can be the game’s biggest annoyance.
Huge wonders require a lot of wood to build. If you don’t already have a Norse or Celtic wonder, the easiest way to get wood is by using quick wood strategies. Note that casting a Wood miracle onto a prospective wonder will distract builders from building, delaying the wonder’s completion. Instead, cast the miracle elsewhere, pick up the wood, and drop it onto the wonder.
Miracles
Is this any way to run a religion?
Miracles are boosted only by the wonders on the current land. If you cast a wonder-boosted miracle onto a miracle dispenser and bring the resulting miracle seed to the next land, the wonder boost is lost.
Dismissing an uncast miracle by shaking your hand quickly left and right (or dropping a miracle seed onto an altar) transfers the miracle’s power to the worship site of your starting tribe. This lets you convert miracle seeds into prayer power.
When villagers pray at a worship site, the prayer power stored in the altar increases until a maximum value is reached. However, dropping a miracle seed onto the altar will increase the amount of stored prayer power beyond the maximum.
You can control how some miracles, such as Water and Lightning, are cast. Holding the action button down continuously casts the miracle all at once. Tapping the action button casts the miracle in bursts. The latter yields more power, but takes longer.
In particular, Water miracles are much more effective when cast on trees if you tap the action button slowly. Holding down the action button continuously yields 1-3 seedlings; tapping quickly, 5-8; tapping once every four or five seconds yields 20-28 seedlings. With Lightning, tapping the action button allows you to fire individual bolts.
The Water and Water increase miracles have different effects on plants. The Water miracle makes plants grow and drop seedlings. The Water increase miracle makes plants grow beyond their natural maximum size, but they won’t drop seedlings. (I’m not sure whether there’s a limit to how big a plant can grow, but growth slows dramatically once a plant reaches twice its natural maximum size.)
For the curious, I’ve compiled a list of which villages offer which miracles in story mode.
Gestures
When using a gesture for a powered-up miracle (e.g. Heal increase or Storm extreme), you have to do the spiral gesture, then the gesture specific to the spell, then a third gesture for the power-up. (By the way, when Khazar says “you must experience the benefit of gestures”, am I the only who thinks “I’ll show you a gesture, buddy!”?)
Direction counts when making a gesture; if you do it in reverse you won’t get the miracle you want. The miracle’s icon indicates the proper direction with an animated hotspot.
You can choose the leash with a gesture.
You can cast a limited set of miracles during creature combat (e.g., Heal).
If you haven’t gotten the hint yet: try all the gestures you see in the lower right corner! More generally, try everything you can think of.
Miracle Dispensers
Player-built miracle dispensers don’t automatically create miracle seeds; that power is limited to miracle dispensers already present on a land, and those won as rewards for completing challenges.
When an “automatic” miracle dispenser is damaged it stops creating miracle seeds, and won’t automatically restart when rebuilt. The good news is that you can sometimes restart it by hand. Immediately after a broken miracle dispenser is rebuilt, cast a few miracles on it. If you do this soon enough after the dispenser is rebuilt, it will resume dispensing free miracle seeds. Wait too long, though, and it won’t work. Which miracle you cast on the dispenser doesn’t seem to matter; I was able to restart land 3’s Wood miracle dispenser by casting Fireball on it. However, you can’t change the type of miracle dispensed by an automatic miracle dispenser.
Teleports
Teleports aren’t paired, that is, one pair doesn’t connect A to B while another pair connects C to D. All teleports connect to each other, so when you create a new teleport you don’t need to specify where it connects to.
For a villager to use a teleport, it must exist before the villager decides on a destination. If a villager is already going to a destination which has a teleport nearby, she will ignore a teleport cast directly in her path even though using it would cut her travel time. Apparently villagers choose their path when they decide to go somewhere, and ignore anything helpful added after they’ve chosen.
The longest journey most villagers ever make is to their worship site. To shorten this, cast one teleport at your temple, and one in each remote village. Cast a teleport in a remote village before you convert it; otherwise, the villagers who go to build the worship site won’t use it.
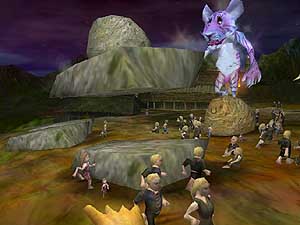
Creature

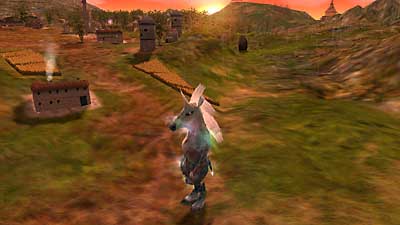
A wondrously impressive creature-cast miracle
Your creature will grow faster if it sleeps through the night in its pen.
To get your creature to dance, first leash it to some dancing villagers with the leash of learning. When it’s learned to dance, leash it with the leash of compassion to the village center.
Don’t always reward high; establish a hierarchy of rewards, reserving high rewards (70%+) only for exceptionally good behavior. Routine good behavior should be 10-30%. Likewise, mete out harsh punishment only in exceptional circumstances, as too much can make a creature rebellious.
Keep track of which leash your creature’s on. In particular, if it’s on the leash of aggression and loses a battle, remember to take it off that leash before it reappears in its creature pen. Otherwise, it’s liable to attack your temple or things surrounding it.
To train your creature to convert villages, save the game after you’ve established yourself on the second land. This land offers many villages to convert, as well as the Miracle Flock and Enlarge Creature miracles. When you finish the land, repeat it until your creature can convert a village without your godly oversight.
If you’re a good god, don’t despair if your creature is described in the Creature Cave as “black-hearted”. It’s on the path to evil, but hasn’t gotten there yet. With work, you can rehabilitate it. For example, teach your creature to pick up and stroke villagers; that will help your creature become good.
Wonders boost the miracles your creature casts, too.
The simplest way for good gods to deal with enemy creatures is to keep them distracted. If the Holy Flies miracle is available, build a Greek or Egyptian wonder to boost the miracle’s duration. If the Loving Creature miracle is available, a Tibetan wonder will do the trick.
Village Desires
There will always be desire
Like creatures, a village’s needs and desires aren’t necessarily the same. You gain more belief for fulfilling a desire than a need. For example, if a village’s wood desire flag hasn’t appeared [no desire], you won’t get much belief for filling the storehouse with wood, even if the storehouse is empty [high need]. Use this to your advantage in the later lands, where your opponents steal wood from storehouses. Watch the storehouse closely; when a desire flag rises, cast an appropriate miracle to reap a large belief increase.
It’s impossible to satisfy all village desires simultaneously. If you build more housing than villagers, the expand flag [heart] rises; conversely, if there are more villagers than abodes to house them, the build flag [bricks] rises. I don’t worry about these two flags if there’s more homes than villagers. However, immediately satisfy the other desires (food, wood, civic buildings, protection, and mercy) whenever possible.
No matter how many abodes you build, villagers will always cry for more (if they’re not crying for something else). It seems to be the default desire when all others are satisfied.
Disciples
With a few exceptions, it’s rarely necessary to create more than a handful of disciples after land 1. Once you’ve built a huge Norse wonder, disciple foresters, farmers, fishers, and craftsmen are unnecessary. Disciple traders take too long to be effective (unless perhaps you use teleports to shorten their journey). Disciple missionaries are handy for converting villages with few or no villagers, although good gods probably won’t find that this situation arises often.
The useful disciples are breeders and builders. It’s always good to keep at least one male disciple breeder in each village to keep its population from crashing, and at least one disciple builder to keep unused buildings in repair.
Alignment
Allowing harm to your villagers through inaction (e.g., letting fireballs fry them on land 4, or simply not noticing that they’re hungry) is evil. Yup, you’re being graded on your management skill.
If you’re very good, a rainbow appears in the sky, your temple’s fins rise slightly off the ground (but not the tips, which curve downward), the land itself lightens, and the fingernails of your hand become pastel colors. Night might be shorter, too.
It is possible to win the game while remaining extremely good.
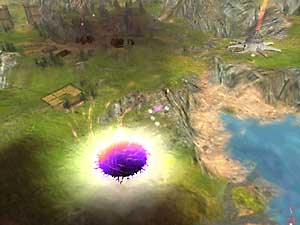
Influence
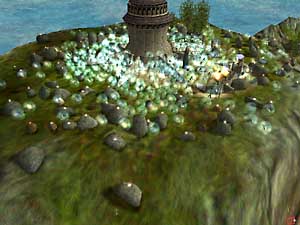
A serious case of influence
-
Four ways to expand your influence, in order of increasing effectiveness:
- Generate more belief in a village at the edge of your influence (by casting miracles, satisfying desires, using artefacts, etc)
- Create a new village just outside your influence
- Build huge wonders in a village at the edge of your influence
- Convert an established village outside your influence
Methods 3 & 4 are significantly more effective than 1 & 2.
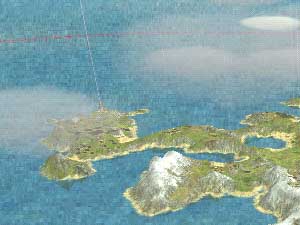
If you really work at it, you can increase your influence into a perfect circle far beyond a land’s shores.
Building(s)
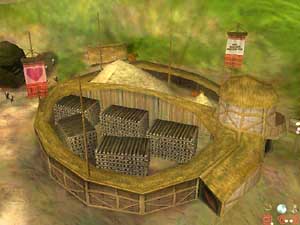
Instant village, just add wood!
If you don’t have a Norse wonder, the Wood miracle isn’t the most efficient way to gain a large amount of wood for building. Instead, use one of the quick forestry techniques.
To build more large abodes, stockpile 2-scaffolds outside the workshop. When you notice a 2-scaffold will make the largest abode, immediately grab the others and place them. They’ll all become the same type of dwelling. (The building type seems to change partway through the construction of the first abode.)
The workshop will stop producing new scaffolds when there are three in its pen, even if it has a large supply of wood. To get it to make more scaffolds, remove some from the pen.
Throw a lot of wood into the workshop and harvest the scaffolds that come out; hoard enough to create an “instant village” of village center, storehouse, and several large dwellings. Use it to expand your influence.
If you see an ethereal arc emanating from the top of the temple, that means it’s taking damage and deflecting it to the rest of your buildings and villagers. This is a sign that you’re in trouble.
You can reach inside buildings with your godly hand.
Isolated abodes can be built up into villages, which is useful when preparing for land 5. These villages don’t behave like normal villages, though; when I built a village from an abode, the population according to the village totem was over four billion (specifically, hexadecimal FFFFFFFE, which looks like a signed underflow bug), even though there were only a few inhabitants. This led to ridiculously large belief bonuses when miracles were cast (e.g., ~14,000), but it also meant that despite having a full storehouse, the village’s food desire was always pegged at 100%.
Plants & Animals
Normal and Water-increased trees
Creating a forest by replanting
Lands are divided into fertile and infertile areas. Trees & bushes in fertile areas will continue to grow without watering. The only way to tell whether an area’s fertile is to watch the puff of smoke/dust given off when something’s planted there. If the smoke is green, the area’s fertile; brown indicates infertility. Beaches are usually fertile.
Plants in fertile areas drop seedlings on their own, but it takes several years of game time for them to do so. Plants drop seedlings more frequently when there’s open space around them.
Build fields on fertile land, then plant trees next to or in them. Watering the fields will make the trees drop seedlings.
The hardwood trees (deciduous) yield significantly more wood (500-800) than conifers (350-400), palm trees and hedges (300), and small bushes (15).
Bushes seem to take just as long as trees to grow to full size, but their small size makes the process seem slower.
Forestry
Wood is required for expansion, so having enough is vital to your success. The best way to gain wood quickly is through Norse and Celtic wonders. If you don’t have a wonder, you can use several other methods for increasing the number of trees in your influence. The methods below are arranged from slowest to fastest.
Help nature take its course. You can create forests with little effort by replanting mature trees throughout fertile regions. Space them out so they’ll drop seedlings. Over time these seedlings will mature and drop more seedlings, and so on. Growing a forest this way is a very slow process, requiring years of game time. It’s best to do this as early as possible in a land, to give the forests extra time to grow.
Cast Water miracles on trees. Call enough villagers to their worship site to let you cast Water miracles every few minutes. [10-15 worshippers should be enough.] Plant a tree in an empty fertile region, then cast a Water miracle on it and slowly tap the action button repeatedly to yield many seedlings. While the new grove matures, replant the original tree elsewhere and repeat the process until your wood need is fulfilled. This method yields the most wood for very little mana cost: an unboosted Wood miracle yields 1,660 wood, but a grove of high-yield trees can yield up to 20,000 wood. The tradeoff is the time spent casting the Water miracle.
In all lands except the first you can combine the Water and Forest miracles. Cast a Forest miracle, harvest all but three or four trees on the forest’s edge, then slowly tap a Water miracle over the remaining trees. Seedlings will drop and mature into large high-yield trees in seconds. Harvest the new trees for 5-20,000 wood. Repeat the water-and-harvest cycle as needed.
Animals
Some villages are plagued by wolves. Their nocturnal forays are hard to notice, so it’s easy to lose villagers to them. During the day, the wolves hide in nearby forests. An easy way to find them is to cast a Japanese wonder-boosted Heal miracle near the forest. Pause the game (P) when the healing glow appears, then zoom around the landscape looking for the glow where you wouldn’t expect it (specifically, in forests). To help distinguish villagers from animals, turn on statistics (S).
Landscaping
Family fun at Eden’s scenic Floating Rocks
To create bonsai, replant a tree in an infertile (brown smoke) area, then tap a Water miracle on it to create seedlings. If left unwatered, the seedlings won’t grow. Use these mini-trees as a fun alternative to shrubbery for decorating your villages!
Here’s an amusing trick: make rocks float in midair. Find a flat rock—you’ll have to search for one, but they exist—and put another rock on it. Grab and remove the bottom rock. Voilà! The upper rock now floats unsupported. To make rocks float higher, put a rock on a stack of flat rocks. Try pulling every other rock from the stack. Imagine the landscaping possibilities!
(Note: if you make an artefact float, its icon won’t appear. Also, villagers will not make floating rocks into artefacts.)
Combine the Water and Forest miracles to quickly grow extra-large trees. Replant the new trees around your village. These trees will not disappear when the Forest miracle ends.
Weather
Some villages (e.g., land 3’s starting village and a Tibetan village on land 5) are subject to storms whose lightning can kill many villagers very quickly. (The villagers run to help injured people or extinguish fires, and are then struck by the next bolts of lightning—which, unlike those in the real world, do strike the same place repeatedly). Spiritual shields seem to be an effective defense. Also, make sure graveyards aren’t damaged; without a graveyard people will come to mourn lightning victims, and be struck in turn.
Skirmishes
When starting a skirmish map, pause the game and familiarize yourself with the map. This will help you choose an expansion strategy. For example, you might want to deny a miracle dispenser to your opponent, or convert a town which offers a favorite miracle.
You can’t save and load skirmish games. Once a skirmish has begun, your options are win, lose, or forfeit.
Story Mode
Vortexes & Preparing for New Lands
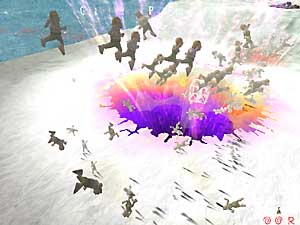
Land 2’s Precision Flying Celt Team
demonstrates its moves
Different kinds of things suffer different amounts of loss when brought through a vortex: artefacts seem to come through intact, as do villagers. Food, wood, and miracle seeds suffer some loss. Most seriously affected are wonder scaffolds, with an approximately 90% loss rate. If you want one wonder scaffold to come through a vortex, throw in ten or twenty.
Things come out of a vortex in the order in which they entered it, so be careful lest emerging artefacts crush villagers! Throw all your artefacts in first, followed by miracle seeds, scaffolds, food & wood, and finally villagers.
If you’ve got a Norse wonder it’s more efficient to cast Food & Wood miracles onto the vortex directly, rather than throw in miracle seeds. One fully-boosted Wood miracle equals one hundred Wood miracle seeds. However, land 4 is an exception.
When casting fully-boosted Food & Wood miracles on a vortex, do at least twelve of each; eighteen or twenty Wood is probably better.
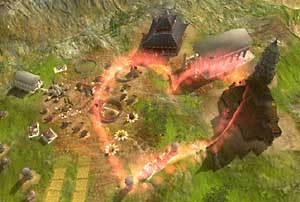
Unfortunately, there is a drawback to bringing so many resources forward: they’re flammable. It’s tempting to just leave the stuff where it comes out of the vortex (i.e., near your temple), but if it catches fire, you’re going to have a tough job putting it out. Even worse, the fire can damage your temple, and burning villagers can spread the blaze quickly. This seems to happen most often partway through land 5.
Always bring wonder scaffolds to the next land, if only for the influence boost. Spend a half hour doing nothing but making wonder scaffolds and throwing them into the vortex. Bookmark the vortex, then visit a few workshops (see chart), bookmarking and casting boosted wood miracles onto them. Repeatedly make the circuit of workshops, combining scaffolds as they’re produced. When you’ve made a wonder scaffold, throw it into the vortex. You can create many quickly at double-speed (Alt-2).
On lands 2 and 3, you can use a teleport to lure to the next land the entire population of the village closest to the vortex. When the vortex appears, put a teleport on the far side of the vortex from the village. Put another teleport at your temple. Return to the village and raise its totem to 100%. All the villagers will be sucked into the vortex as they go to the teleport. If there are any at the worship site, lower the totem to 0% and they’ll be sucked into the vortex when they return home.
On land 4 you can use a variant of the vortex/teleport trick to bring forward most of the land’s population. Put one teleport in the center of a village far from your temple. Put another teleport next to the vortex, and remove all other teleports from the Norse village. Now raise the remote village’s totem. Villagers will come out of the teleport near the vortex and be sucked in. Return to the village and lower the totem to 0% to get anyone already at the worship site.
You can use this trick in all villages except the Norse village itself. If you want the Norse villagers too, set a scaffold down next to the vortex. Eventually, most of the villagers will get sucked into the vortex trying to build the structure. (Note: this trick might not get everyone—children and some types of disciples may not succumb—but it should give you more than enough villagers on the final land.)
If you’re a masochist, you can use the ultimate method to bring everyone forward. Bring all villagers to the temple by setting all totems to 100%. Remove all teleports except one at the temple and one next to the vortex, then pick up villagers and drop them onto the teleport one by one. They’ll come out next to the vortex and get sucked in. You can get everyone on a land this way, but it takes a lot of work. And what will you house them in on the next land—a shoe?
Scrolls and Puzzles
You don’t need to do most of the silver scroll challenges and puzzles. The ones you should do are *starred.
Land 1
* If you bring all the stuff The Explorers need (wood, grain, 2 animals) before you click the scroll, they’ll sing the song all the way through without interruption. Even though it’s annoying, do this challenge; it will pay off nicely on land 5.
To save The Drowning Villagers, click your creature’s leash near the villagers; don’t attach it to them. As soon as your creature picks up a villager, click on the shore. Don’t give your creature time to get bored and throw the villager.
Ignore The Hermit. The reward the old coot offers isn’t anything you haven’t already got if you completed the Explorers challenge. If you feel you must complete this challenge, don’t start it until your creature is as tall as the pillars at the entrance to the creature pen. If you start the challenge too early, the yokel can die of old age before your creature’s big enough to impress him. Also, make sure your creature doesn’t eat people; it’s impossible to impress a guy who’s just become creature chow.
If you postpone the Singing Stones challenge until after the vortex to land 2 has opened, you can throw unbreakable singing stones into the vortex. They’ll respawn, so you have in effect an endless supply of good artefact material on the next land.
Land 2
You have better things to do than waste time trying to complete The Workshop challenge. Work on converting villages instead. It’s much easier to build enough abodes for your people after you’ve built a Norse wonder.
When the gold scroll for Khazar’s Gesture Lesson appears a little ways from your first village, the storehouse in the nearby Indian village will empty. If you convert that village before the scroll appears, move all of the storehouse’s wood and most of its food to another village to prevent it from evaporating. Waste not, want not.
* The Plague: a silver scroll appears above a tent in the second Indian village. Before clicking on the scroll, remove all the food from the storehouse and dump it nearby. Also, send a bunch of worshippers from the first Indian village to the temple. You’ll need them to power the Heal miracles you’ll need to complete this challenge. The sick villagers will be green. Alternatively, you can cast teleports at the village and worship site, raise the totem to 100%, and heal everyone at the worship site. Once the challenge is done, return the untainted food to the storehouse.
The Riddles: “Place in the ring something which howls at night”, etc. Wolves are hard to find, but check the adjacent forest. If you haven’t found any after a few hours check the beach below the village this challenge appeared in. I once found a pack of more than a hundred there. Note: the reward (a Zebra creature) is useless if your creature has already been abducted by Lethys, so if you want a zebra, do this challenge before converting the Celtic villages.
* If your creature’s already been abducted, The Drowning Children challenge isn’t immediately useful. Do it anyway; Enlarge Creature miracle seeds from the dispenser you earn as a reward will help on later lands.
* To solve The Tree Puzzle always make symmetric moves, or just look at the solution. Do this challenge, as it earns you a very useful Winged Creatures miracle dispenser.
The Spiritual Healer in the Greek village nearest the Celts keeps everyone in the village young by sacrificing children. But if you remove the guy, everyone dies. If this bothers you, recall all villagers from the worship site, then relocate everyone except the healer to other villages. (Check the village totem to make sure you’ve got everyone.) Once the village’s population is zero, remove the healer, then repopulate the village. This will take a long time, and have no tangible benefit. Sucks to be moral, doesn’t it?
* The Idol challenge has a minor bug: sometimes after the challenge is completed, the (pseudo?)Gregorian music doesn’t stop playing. Hope you like it, as you’re gonna hear it until you leave the land.
There doesn’t seem to be a good solution to The Greedy Farmer challenge.
Land 3
The Shaolin Challenge is long, fussy, and you won’t need the shaolin’s help if you follow the instructions for land 3 below. If you must try this challenge, make liberal use of Alt-1/2, P, and Ctrl-S/L.
* The Second Tree Puzzle: again, do this challenge to earn the Winged Creatures miracle. Here’s how.
Land 4
Wait to complete The Heartbroken Man until both he and the Aztec village are in your influence. If you’ve built three wonders, the wait shouldn’t be long.
The Japanese Totem Puzzle is ignorable, as you already have its reward (a Spiritual Shield miracle dispenser). If you must solve it, see this analysis of the puzzle.
Land 1
Land 1’s vortex
Aside from training your creature, spend most of this land preparing for the next. Divide your people into three groups: disciple farmers, disciple foresters, and a third group with nothing to do except make artefacts. Have the latter group make eleven to prepare for the next land. The disciple foresters and farmers will fill your storehouses. Always keep at least one male breeder in each village to keep your population from crashing.
While the villagers work, you’ll have a lot of spare time. Spend it watching your creature, teaching it good habits. The first few years of a creature’s life are crucial if you want it to grow to an appreciable size, so pay attention!
Make sure the Norse village’s forester disciples have a ready supply of wood. Plant a few trees on the beaches and periodically water them with Water miracles to create new seedlings.
If you like the look of evil, you can landscape with the leafless black trees found near the ogre. Normally these trees are beyond your influence, but you can grab one just after getting the reward for completing the Ogre challenge. Replant in a fertile area, make some seedlings, and make your town look eeeeevil.
Preparing for Land 2
Before you click the last gold scroll, put all of the artefacts and the wood & food from both storehouses where the vortex will open up. This is near the farm where the woman with the sick brother lives, but closer to the shore. (A herd is grazing nearby.) Also put the land’s inhabitants into the vortex; beginning the next land with extra people makes it easier.
Land 2
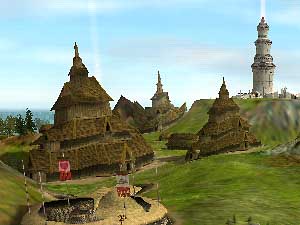
Build Norse wonders early and often
This land has many villages (eleven). Though it’s tempting (and easy) to take this land quickly, use the opportunity to teach your creature how to convert villages. This skill will be vital on lands 4 and 5. Tip: once the boring tutorials are over, save the game. If your creature isn’t good at converting villages on its own by the end of this land, replay the land until it is.
Start building a huge Norse wonder as soon as your villagers build a workshop. (Use artefacts you created in land 1 to boost the wonder’s size; for wood, use the easy wood strategy.) Building a huge wonder takes time, so remember to keep your worshippers fed and healed. When the wonder is done, start another. Supply it with a few wonder-boosted Wood miracles.
While your villagers are building wonders, you’ll have time to convert the first two Indian villages. If you’re feeling ambitious, begin building an Indian wonder too.
When your influence approaches the Indian village nearest the Celts, do the tree puzzle to gain a Winged Creatures miracle dispenser. Bookmark the miracle dispenser and harvest one every chance you get. Do this for the Enlarge Creature miracle too, but not as often (it charges much more quickly). This is the only land where the Enlarge Creature miracle is readily available, so either teach it to your creature here or bring lots of miracle seeds forward to later lands. This miracle’s duration is increased by Greek wonders, which makes it useful on land 5.
The Indian village closest to the Greeks suffers occasional wolf attacks.
You can operate within Khazar’s influence as if it were your own.
Converting two of Khazar’s or Lethys’s villages triggers Lethys’s abduction of your creature. If you want to hang out on the land and do all its challenges, some of which don’t show up for a while, postpone taking on Lethys.
Preparing for Land 3
Before you prepare for the next land, build enough Norse wonders to max the Wood miracle (166,000 wood per casting).
Do the standard preparation for going to a new land, with these additions: create and throw into the vortex a dozen Holy Flies miracle seeds, several dozen Enlarge Creature miracle seeds, and twice the usual amount of grain. While you’re doing the standard prep, build up the far Celtic village to 200+ villagers. Then use the teleport/vortex trick to bring them to the next land.
Land 3
Might I have overprepared for this land?
This land is deceptive. Lacking a Norse tribe, it would seem that wood is the scarce resource, but in actuality the bottleneck is grain. Once you’ve converted the Indian village and built a huge Celtic wonder, your wood problems should be over. However, nothing boosts grain production except more fields and disciple farmers.
It’s best to plow through this land quickly to keep Lethys from strengthening his position. To this end, increase your influence by building wonders. Begin one in your starting village as soon as possible (even before villagers exit the vortex), and build another in the same village. This will allow you to reach the Japanese village, which is quickly converted, and gets you to the Indian village. From then on, whenever you convert a village, immediately start building a wonder there. With two in the first village and one each in the Japanese and Indian villages, I was able to reach both the Egyptian village and the far Tibetan village. This let me whittle their belief down simultaneously.
Before converting the Japanese village, make two Water miracle seeds (if you haven’t built a miracle dispenser, cast Water on the Wood miracle dispenser below your starting village). Stash the miracle seeds near the Japanese village. Soon after you convert this village, Lethys will set some of its people on fire. Use the Water miracle seeds to put the burning villagers out, then heal them. Note: if you use Alt-1 to slow down the burning villagers, the game will return to normal time every time you’ve doused a few.
Once the Japanese village is yours, postpone converting the Indian village until the Japanese worship site is built and there’s a fair amount of prayer power in it. You’ll need it for the next challenge. Also, the Japanese village suffers wolf predation.
Before converting the Indian village, make two Lightning miracle seeds and stash them near the village. After you convert the village, Lethys will send wolves against it. When the wolves appear, cast the Lightning miracles and tap the action button to fire individual bolts. You should be able to kill all the wolves before they reach the village. (Use Alt-1 to slow down time if necessary.) Dump the crispy critters (worth 700 food apiece) into whichever village store needs food.
After converting the Indian village, do the tree puzzle near the annoying unkillable guy to gain an Indian-powered Winged Creatures miracle. Also, distribute the eight large unbreakable brown stones on the nearby shore throughout your villages to turn them into artefacts.
After you take the last Tibetan village and banish Lethys, his creature still roams the land. Build a huge Egyptian wonder and cast some Holy Flies miracles on the beastie to keep it occupied.
Your starting village is subject to lightning storms. Protect the area around the village center with a Spiritual Shield, and build a graveyard.
Preparing for Land 4
Aside from the standard new land preparation, create & throw in many Winged Creatures miracle seeds (you won’t have access to this miracle again until partway through land 5). Throw in all the Enlarge Creature miracle seeds you haven’t used. Then use the teleport/vortex trick on the Egyptian village, or place a scaffold next to the vortex to lure in villagers.
Land 4

Protect your village from fireballs with a spiritual shield
You face two challenges at the beginning of this land: ogres steal your villagers, and periodic rains of fireballs. The ogre problem is easy and quick to deal with, so I do it first. You can avoid villager loss during raids by raising the village totem to 100% when the ogres approach. Once that battle is won, send your creature to convert the Japanese village.
Fireballs are harder to deal with. If your creature isn’t good at converting villages, you may suffer several rains of fireballs. The primary way to handle this problem is to send at least 80% of your villagers to the worship site, then create a spiritual shield centered on the village center and large enough to protect the workshop. Your worshippers will be able to maintain the shield until you stop the fireballs. (Don’t forget to supply them with food!)
The worst case is losing your village center. This recalls all villagers from the worship site, denying you the power to create a shield. If this happens, you’ll have to grab fireballs out of the air before they reach your village. It suffices to grab only one; for the rest, simply touch the caught fireball to others to absorb them. Slowing time (Alt-1) helps. Once you reestablish the shield, you can prolong its life by using the catch-and-touch trick to keep fireballs from striking it.
Start building a Norse wonder behind the temple or somewhere else out of the path of stray fireballs. Upon completion, your influence will have expanded enough to reach the Japanese village. This is critical if your creature is bad at converting villages. When the Japanese village is converted, create a workshop and start building a wonder there. Combined with a second Norse wonder, your influence should reach the cursed village.
After your creature converts the Aztec village, you can destroy the last guardian stone by carrying Keiko to her brother.
Preparing for Land 5
Prep is a bit different on this land: it begins with creating a Celtic workshop in order to produce Celtic wonder scaffolds, which on land 5 will make Greek wonders. Find the Celtic abode that houses the woman who told you about the third guardian stone challenge (reuniting Keiko & Adam). Grab a few villagers from elsewhere and place them by the house so that the “live here” icon appears above them. Then create a workshop scaffold in another village and drop it by the abode. The villagers will eventually construct the workshop, after which you can produce Celtic wonder scaffolds as in any town.
You may be able to do the same thing with the Indian teepee where Adam lives. Wonder scaffolds made there should become Japanese wonders on land 5.
As usual, start throwing things into the vortex beginning with your artefacts. You won’t gain the Wood & Food miracles until most of the way through the next land (in the Greek and Aztec villages, respectively), so cast a lot of each resource—two or three million—into the vortex. Create many Wood & Food miracle seeds (twenty or thirty of each) and throw them into the vortex too; they’ll be extremely useful once you’ve built some large Norse wonders on land 5. You won’t have early access to the Spiritual Shield miracle either, so harvest 20-30 miracle seeds from the miracle dispenser behind the temple and throw those into the vortex too. Create quite a few (20?) wonder scaffolds in each village (including Celtic) and throw them into the vortex. Finally, use the other vortex/teleport trick to bring as many of the land’s people as you like to the final land.
Before you enter the vortex, back up your creature. Even with patch 1.2, the curses on land 5 can sometimes become permanent.
Land 5
IMPORTANT NOTE: Black & White tends to crash when you convert villages on this land, particularly the last village. Save the game just before you do so! Use both full save (F7) and Quick Save (Ctrl-S).
It is possible to be quite good on this land
Building many wonders is the key to winning this land. Aside from the boost they give to miracles, they also expand your influence. This will be critical when you need to convert villages. Nemesis will attack your wonders, so it’s wise to build at least three huge wonders of each type for redundancy. Spread the types between different villages.
Using the wood and wonder scaffolds that came through the vortex, start building a Norse wonder immediately, as well as whichever other wonders you’ve got wonder scaffolds for, except Aztec. Break the Aztec wonder scaffolds apart and use them for other buildings. Save any Wood & Food miracle seeds until after you’ve built at least two huge Norse wonders, which will increase their yield up to a hundred times. It’s much more convenient to cast one boosted Wood or Food miracle on a village store than it is to ferry an equivalent amount of wood or food from elsewhere.
Build at least two huge Tibetan wonders. They boost the duration of the Loving Creature miracle, which can render the enemy creature harmless for ten to fifteen minutes at time. In addition, they boost the duration of shield miracles, which are very important in this land. You’ll need them to protect many things:
When you convert the Tibetan and Greek villages, Nemesis destroys their wonders. If your influence covers these villages before you convert them, cast spiritual shields over their wonders to protect them from Nemesis’s attacks.
As soon as you convert the Greek and Tibetan villages, Nemesis will start raining down megablasts in advancing rows. Use spiritual shields to protect the Greek wonder and the Tibetan wonder in the village near the Japanese. In addition, soon after you convert the Greek village, it suffers a rain of meteors. Protect the entire village with a physical shield to earn a Holy Flies miracle seed.
The Tibetan village nearest the Japanese is subject to lightning storms; protect the area encompassing the village store, wonder, workshop, and graveyard with a spiritual shield.
The Winged Creatures miracle dispenser you get for completing the Dragon Hunters challenge usually doesn’t last long without protection. The first three times I played this land, something destroyed it (Nemesis acting outside his influence? Storms?). When the miracle dispenser appears, protect it with a spiritual shield.
Your temple will suffer a (scripted?) lightning attack partway through the land. A spiritual shield will protect it.
To extend your influence to the final village, build near the Greek village a huge wonder of each type except Aztec. With three huge wonders, your influence should reach the Aztec village. Beware! Nemesis will attack these wonders even though they’re far outside his influence, so protect them with spiritual shields.
The Japanese village is plagued by wolves that live in the nearby forest.
If Nemesis attacks your creature and knocks it out, it will respawn in the creature pen as usual. Unfortunately, sometimes Nemesis will continue attacking it, even though your creature pen is far outside Nemesis’s influence. When this happens your temple takes damage, which is deflected to your village(s). You can avoid this by keeping your creature out of Nemesis’s territory. This makes it less useful than one would desire, but better that than losing villagers, homes, and wonders. With your creature barred from unconverted villages, use a combination of artefacts and miracles to convert them instead.
When you finally reach the Aztec village it’s tempting to destroy its village center to recall the last few worshippers from Nemesis’s temple, thus denying him additional prayer power. Don’t do it! The village center is the only indicator of how close you are to converting the village. The game crashes often when you convert the last village (for me, at least), so it’s critical to know when to save the game. Save the game often at this point; I do so every time the belief required drops by one hundred, and even more often in the last hundred.
After converting the last village, if you want to play around in the now-peaceful land, postpone Nemesis’s creature battle challenge. You’ll be uninterrupted for as long as you want before the battle. Afterward, if you want to play around more, don’t lead your creature to the volcano. Doing so will trigger a trippy cutscene that ends with the land in permanent evening, where the villagers stay inside and sleep. Not very fun. Or you could save the game just before leading your creature to the volcano, then load the saved game after you tire of perpetual twilight.
The victor at (yawn) sunset